
How to winterize your residential swimming pool
Table of content
In southwestern states, such as Arizona or New Mexico, an in-ground pool can provide cool recreation for much of the year. However, even in warm states, eventually, for most pools, pool closing & winterization is required to safeguard it from cracking or chipping if the weather turns cold.

Additionally, because winterizing removes the debris from your pool, you do not have to go through the process of cleaning the pool as you prepare it or re-fill it for the upcoming summer months.
Step 1: pH Balance and hardness
The first step in winterization begins even before you empty the water. In fact, it begins as you enjoy the pool throughout the summer. This first step in the winterization process is simply to maintain the proper alkalinity of the water by monitoring the pH balance. For instance, a pH balance of seven is considered neutral. Any score below seven is considered acidic, and any score above seven is considered alkaline. For pools, the ideal pH balance is 7.4, which is the matching pH for eye membranes. Additionally, a score of 7.4 allows chlorine to do a good job of keeping the pool clean.
Low pH balances, acidic water, will eat through your pool lining. High pH balances, alkaline, will cloud the water and create lime residue. Additionally, you should ideally keep a balanced water hardness by testing the water and adding water-softening salt treatments, if necessary. Hard water creates mineral buildup along all parts of your pool, which can make cleaning tremendously difficult. Maintaining water quality by monitoring pH and hardness makes winterization easier because there is less cleaning and fewer repairs.
Step 2: The skimmer
Another pre-winter strategy for protecting your pool involves maintaining a water level that remains just under the skimmer. If the water level gets too high, water will seep into the skimmer’s throat where it can collect. During the water, this collection of water can freeze and expand, potentially damaging the internals of your pool. Additionally, you can put something called an Aquador over the skimmer’s mouth. If you do not empty the pool during the winter, this practice achieves the same thing as keeping the water level low. However, it also allows for a higher water level during winter, which can support your cover. Finally, if you do not want your liner to come into contact with the water surface, the Aquador is the solution of choice.
Step 3: The plumbing
In order to keep the plumbing from freezing, you need to clear the filter system, which involves blowing excess water from each of the plumbing lines. You can accomplish this easily with a shop vac. For instance, you can direct the discharge of the vacuum into the lines, and this air pressure will help flush them out. Once you have drained the lines, you need to plug them. Plugs come in variety of designs, but the ones that work best are threaded. Regardless which type of plug you use, you will need to create a tight seal by using an O ring. An O ring fits around the plug and compresses within the line. Once it is in place, the rubber expands ever so slightly to create an air-tight seal within the line.
Note: if you use an un-threaded plug, the best option is a rubber freeze plug.
Step 4: Draining the filter
Note: prior to draining the filter, you should ensure that as much of the chlorine and bromine have drained from the feeder. By unplugging the bottom filter plug, you can allow the water to drain from your filter. This is critical as remaining water can freeze and crack the filter. However, to do it right, if your pool is equipped with a relief valve, you need to open it because it will allow proper air flow as the water drains. If you do not open the relief valve, some level of negative air pressure will build up and potentially keep all the water from draining properly.
If you have an air valve, it might be labelled as such. If so, set it to the position of “winterize”, and open it. Some valves have dual plugs, both of which must be removed. Once the filter is drained, you need to clear the lines. Do this by very briefly running the pump. However, do not run the pump for more than a couple seconds as running it while dry can create friction and damage the filter resulting in the need for professional pool service.
Step 5: Remaining equipment
With excess chlorine and bromine out of the feeder and with the filter drained, you can now drain the actual chemical feeder. Additionally, you should drain all the equipment that will contain any water. These pieces of equipment are as follows.
– water pump
– heater
– all hoses
Step 6: Organization
As you winterize your pool, put all the plugs into pump strainer basket. Doing so will keep them dry and ensure you do not misplace them. Regarding the pressure gauge, you should store it somewhere warm throughout the cold season. Doing so will ensure the internal elements are not broken.
Note: once you remove a plug, do not replace it into its slot. You might forget it is there, and if it remains there for the season, it might prevent water from draining.
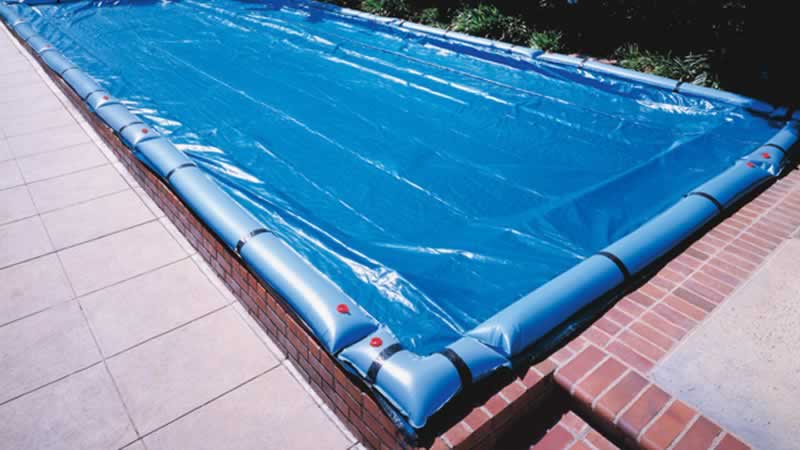
Step 7: The cover
Finally, cover your pool. Whether you empty your entire pool or leave water in it, the cover keeps debris out. Less debris, of course, means less cleaning the following season. If you use a solid cover, it will keep out all debris. However, solid covers are heavier and harder to install than mesh covers. Mesh covers, though lighter, allow some debris to get into the pool because the spaces in the mesh cannot prevent small objects from falling through. That said, either type of cover will protect your pool.
This pool winterization guide is provided by Twin Pool And Spa Rockville.
About the author – John Barnes
 Handyman tips website was created by John Barnes from Phoenix, Arizona, in February 2014. John wanted to share with the public his 20 year experience in home improvement as a contractor and avid woodworker. John noticed that there aren’t many expert advice online and he wanted to help the public to get true expert tips and estimates. What started as a hobby soon became a full time job as Handyman tips website became very popular because of the quality of tips it provides. After a few years John has introduces a couple of new content creators into Handyman tips team but he is still the main content creator on Handyman tips website.