
Can You Mount a TV on the Wall in a Rental Apartment?
Table of content
Wall-mounted TVs are a sleek and space-saving upgrade for any living space — especially in compact apartments where floor space is limited. But if you’re a renter, you might be wondering: Can I legally mount my TV on the wall in a rental unit without risking my security deposit?
The good news is: in most cases, yes — you can.
Many landlords today recognize that wall-mounted TVs have become the norm, not the exception. As long as the mounting is done correctly, with minimal wall damage (typically small holes less than ½ inch in diameter), it’s usually considered acceptable. Some property managers even prefer that tenants use wall mounts rather than bulky furniture that could scuff floors or block ventilation.
This article will guide you through everything you need to know about mounting a TV in your rental apartment. We’ll cover:
- What most landlords actually allow (and what they don’t)
- How to mount a TV with minimal risk or damage
- How to calculate the perfect mounting height and angle using a free online tool
- Tips to patch the wall easily before move-out
Whether you’re renting short-term or long-term, you deserve a comfortable and professional-looking home theater setup. And with a bit of planning, you can have one — without putting your deposit at risk.

What Do Most Landlords Allow?
If you’re a renter, it’s important to understand that mounting a TV on the wall isn’t automatically forbidden — but it does depend on your lease and your landlord’s specific policies.
In most standard rental agreements, wall modifications such as drilling are allowed as long as the damage is minor and can be repaired. The key phrase many leases use is “normal wear and tear” — and a few small holes, especially those under ½ inch in diameter, typically fall into this category.
That said, every landlord is different. Some may allow wall-mounted TVs without restrictions, while others may require prior approval or even professional installation. Larger apartment complexes or corporate-managed buildings may have more formal policies in place. To avoid misunderstandings, it’s always best to check your lease and, if necessary, ask your landlord or property manager directly.
How to Approach Your Landlord
If your lease is unclear or silent on wall mounts, send a short, polite message or email. Here’s a sample:
Hi [Landlord’s Name], I’d like to wall-mount a TV in the living room using a standard bracket. It will require a few small holes (less than ½ inch) and I will fully patch and restore the wall before moving out. Please let me know if that’s okay. Thanks!
Most landlords will appreciate the proactive communication — and if they say no, at least you’ve clarified expectations up front.
In summary, the majority of landlords do allow TV mounting if:
- You use small hardware (screws/bolts under ½ inch)
- You mount only into wooden studs (not concrete or tile)
- You agree to restore the wall afterward
Up next, let’s cover how to mount your TV correctly and safely in a rental — so you don’t lose your deposit over a few simple holes.
How to Mount a TV in a Rental Without Risk
Mounting a TV on the wall in a rental is completely doable — if you take the right precautions. The goal is to ensure the installation is safe, secure, and easy to reverse when you move out.
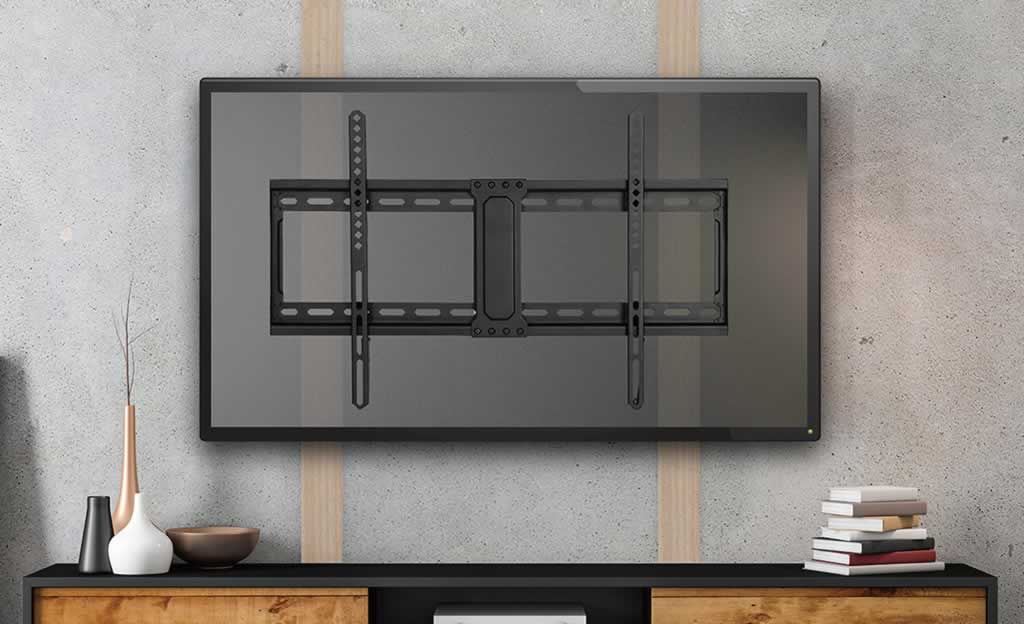
Here’s a step-by-step approach to minimize risk:
1. Locate the Wall Studs
Start with a reliable stud finder. You should always mount your TV bracket into wooden studs, not just drywall. Drywall alone can’t support the weight of a TV safely, and anchoring into it without studs could cause serious damage.
Most apartment walls in the U.S. use 16″ or 24″ stud spacing. Mark your drill points carefully.
2. Use Small-Diameter Screws or Bolts
Most landlords allow wall anchors or bolts up to ½ inch in diameter. This size is typically enough for secure mounting into a stud while keeping damage minimal and easy to patch later.
Avoid heavy-duty toggle bolts or lag screws unless your landlord approves them specifically.
3. Choose the Right Wall (and Avoid the Wrong Ones)
Stick to interior walls with wooden framing. Avoid exterior walls (which may contain insulation or utility lines), tiled surfaces, and any concrete or plaster walls unless you have prior approval.
Also, don’t mount the TV directly above heaters, outlets, or plumbing chases.
4. Plan Your Placement Carefully
Re-drilling to fix height or position will leave extra holes and frustrate your landlord. That’s why you should measure everything first — or better yet, use an online tool like the free calculator at tvmounty.com to get the exact height and bottom-of-TV placement before you start.
5. Mount with Care
Use a level, pre-drill your holes, and tighten your hardware slowly. With good planning and proper tools, the whole install can take under an hour — with minimal mess and maximum stability.
Next: how to calculate the perfect height so you don’t have to redrill a thing.
How to Calculate the Correct Height and Placement
Even if your landlord gives you the green light, mounting your TV too high or too low can ruin the viewing experience — and lead to unnecessary holes in the wall. That’s why proper planning is essential before you start drilling.
Start with Eye Level
The general rule is simple: the center of the TV screen should align with your eye level when you’re seated comfortably. For most adults on a standard sofa, that’s typically 42 to 48 inches from the floor to the center of the screen.
But that’s not a one-size-fits-all number. Your ideal height will depend on:
- Your TV’s size and height
- The distance from your seating area
- Whether you’re using a tilting or fixed mount
- The height of your sofa or bed (especially in studios or open-plan layouts)
Why Guessing Isn’t Worth It
Mounting mistakes are hard to hide in a rental. If you eyeball the height and get it wrong, you’ll have to drill again — leaving behind extra holes you’ll have to patch later. That’s why it’s smarter to calculate everything first.
Use a Free Online Calculator
To make this easier, try the TV Mount Height Calculator – link, a free tool that calculates:
- The perfect center screen height
- The distance from the floor to the bottom edge of the TV
- Recommended tilt angle
- The best mount type for your setup
Just enter your screen size, room type, and seating distance — and get a personalized, printable result you can follow during installation.
With one quick calculation, you’ll save time, avoid mistakes, and keep your walls (and your landlord) happy.
Will You Be Able to Repair the Wall Later?
One of the biggest concerns renters have about mounting a TV is: What happens when it’s time to move out? Will I lose my deposit because of a few holes in the wall?
The short answer: No — not if you patch the wall properly.
Most landlords expect a reasonable amount of wear and tear, and small mounting holes — especially those made with screws under ½ inch in diameter — are easy to fix and fully reversible with basic supplies.
What You’ll Need:
- Lightweight spackling paste or wall repair compound
- A small putty knife
- A fine-grit sanding sponge
- Touch-up paint that matches your wall color (ask your landlord or leasing office for the original paint code)
Simple 3-Step Patch Process:
- Fill: Apply spackle into the holes using the putty knife. Smooth it flat and let it dry completely (usually 1–2 hours).
- Sand: Lightly sand the area until it’s flush with the wall.
- Paint: Dab or roll on a small amount of matching paint. In most cases, one coat is enough.
The result? A wall that looks just like new.
Pro Tip:
If your landlord is especially particular, take “before” and “after” photos of the wall, showing that the damage was minimal and repaired. Keep receipts for any materials or touch-up paint you buy — it shows responsibility and makes a great impression during move-out inspection.
In short, yes — you absolutely can mount your TV and patch the wall later without risk. Just be smart, clean, and thorough — and you’ll walk away with your full deposit intact.
Conclusion
Mounting a TV in your rental apartment isn’t just possible — it’s often easier and more acceptable than most tenants realize. With clear communication, proper tools, and a little planning, you can create a clean, modern entertainment setup without risking your security deposit.
The key is to follow a few simple principles:
- Always check your lease and communicate with your landlord
- Use small hardware (under ½ inch) and mount into wooden studs only
- Avoid unnecessary holes by calculating the correct height in advance
- Patch the wall when you move out using basic materials — it’s quick and affordable
Thanks to modern mounting technology and lightweight flat-screen TVs, a professional-looking installation is more accessible than ever — even in temporary living spaces. In fact, many landlords actually prefer tenants to wall-mount their TVs, as it protects furniture, improves space layout, and eliminates bulky TV stands.
If you want to avoid guesswork and get everything right the first time, we recommend using the free online calculator at TVMounty.com.
It calculates ideal TV height, tilt angle, bottom clearance, and helps you choose the right type of bracket for your room. It’s designed for both homeowners and renters who want to mount smartly and confidently.
So don’t settle for watching your favorite shows at the wrong angle or taking up valuable floor space. Mount your TV the right way — and enjoy your rental as if it were your permanent home.
Because great design, comfort, and tech-friendly living shouldn’t be limited by your lease.
About the author – John Barnes
 Handyman tips website was created by John Barnes from Phoenix, Arizona, in February 2014. John wanted to share with the public his 20 year experience in home improvement as a contractor and avid woodworker. John noticed that there aren’t many expert advice online and he wanted to help the public to get true expert tips and estimates. What started as a hobby soon became a full time job as Handyman tips website became very popular because of the quality of tips it provides. After a few years John has introduces a couple of new content creators into Handyman tips team but he is still the main content creator on Handyman tips website.