
Window Replacement 101: What Every DIYer Needs to Know Before Starting
Table of content
Thinking about tackling a window replacement project on your own? You’re not alone. Window replacement is one of the most popular home improvement projects homeowners take on, and for good reason. New windows can dramatically improve your home’s comfort, energy efficiency, and curb appeal. But before you pick up a pry bar or order a window online, there’s a lot more to know than most tutorials let on. This guide breaks down what the project actually involves, where DIYers commonly go wrong, and how to decide whether you’re ready to handle it yourself or bring in a professional.
Why Window Replacement Is Worth Doing Right
Windows do more than let light in. They seal your home against drafts, noise, moisture, and energy loss. When they start to fail, the effects show up everywhere: higher utility bills, condensation between panes, drafty rooms in winter, and frames that are soft to the touch from years of weather exposure.
According to the U.S. Department of Energy, heat gain and loss through windows can account for 25 to 30 percent of residential heating and cooling energy use. That’s a significant number, and it’s a big reason why homeowners with older homes stand to gain a lot from upgrading their windows.
The goal of any window replacement project isn’t just to swap out glass. It’s to create a tight, properly sealed, structurally sound installation that performs for 20 or more years.
Know Your Window Types First
Before you measure a single opening, you need to understand what type of windows you’re working with and what you’re replacing them with. Here are the most common styles you’ll encounter:
Single Hung Windows The lower sash opens; the upper sash is fixed. These are among the most common window styles found in older homes. They’re cost-effective and relatively simple to replace.
Double Hung Windows Both sashes open and tilt inward for easy cleaning. A popular upgrade choice, especially for second-story windows where exterior cleaning is difficult.
Single Slider Windows One panel slides horizontally while the other remains fixed. Common in ranch-style and mid-century homes.
Casement Windows These open outward on a hinge, like a door. They provide excellent ventilation and a tight seal when closed but require more clearance on the exterior.
Hopper Windows Hinged at the bottom and opening inward, hopper windows are most common in basements and bathrooms. Modern versions have been redesigned for improved ease of use, including simplified screen installation and removal, and updated lock hardware for a cleaner, more functional look.
Bay and Bow Windows These project outward from the home’s exterior wall and typically consist of three or more window units joined at angles. These are advanced projects and involve structural, roofing, and seat board considerations that go well beyond a standard replacement.
Understanding your existing window type matters because it affects your rough opening size, the replacement unit you order, and the installation process itself.
The Two Types of Replacement Windows
This is a detail many first-time DIYers miss entirely. There are two fundamentally different approaches to replacing a window:
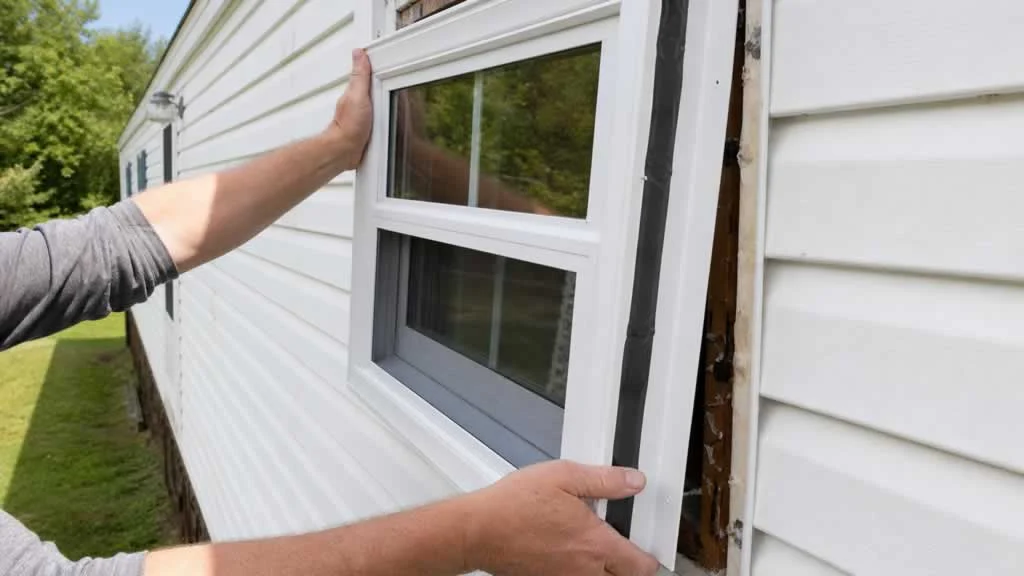
Pocket (Insert) Replacement You remove the existing sashes and hardware but leave the original frame in place. A new window unit is inserted directly into the existing frame. This is faster, less invasive, and typically what most homeowners mean when they say “window replacement.” However, it only works if your existing frame is structurally sound, square, and free of rot.
Full-Frame Replacement The entire window assembly, including the frame, trim, and sometimes surrounding drywall or siding, is removed down to the rough opening. A brand-new unit is then installed from scratch. This method is necessary when the existing frame is rotted, damaged, or out of square, and it’s the only way to address underlying moisture damage or structural issues.
Choosing the wrong method, specifically, doing a pocket replacement when a full-frame replacement is needed, is one of the most common and costly DIY mistakes in window work.
How to Measure for Replacement Windows
Accurate measurements are critical. Order wrong and you’re either squeezing an oversized window into an opening or shimming a small one into an opening with gaps you’ll never fully seal.
For a pocket replacement, measure the existing frame:
- Width: Measure from jamb to jamb (inside edge to inside edge) at the top, middle, and bottom of the opening. Use the smallest measurement.
- Height: Measure from the sill to the top jamb at the left, center, and right. Again, use the smallest measurement.
- Deduct 1/4 inch from both width and height to allow for shimming and leveling.
For a full-frame replacement, measure the rough opening:
- This is the opening in the framing after all old materials are removed.
- Standard practice is to order a window 1/2 inch smaller in both width and height than the rough opening to allow for shimming and leveling.
Always measure twice, or better yet, three times. Window manufacturers typically do not accept returns on custom-sized units.
Tools You’ll Need
A basic window replacement project requires the following tools:
- Tape measure (a quality 25-foot tape is ideal)
- Pry bar and hammer
- Utility knife
- Reciprocating saw (for full-frame replacements)
- Level (at least 48 inches)
- Drill and bits
- Caulk gun
- Low-expansion spray foam insulation
- Exterior and interior caulk
- Safety glasses and work gloves
For full-frame replacements, you may also need a circular saw, roofing repair materials, and potentially interior drywall tools depending on how the opening is finished.
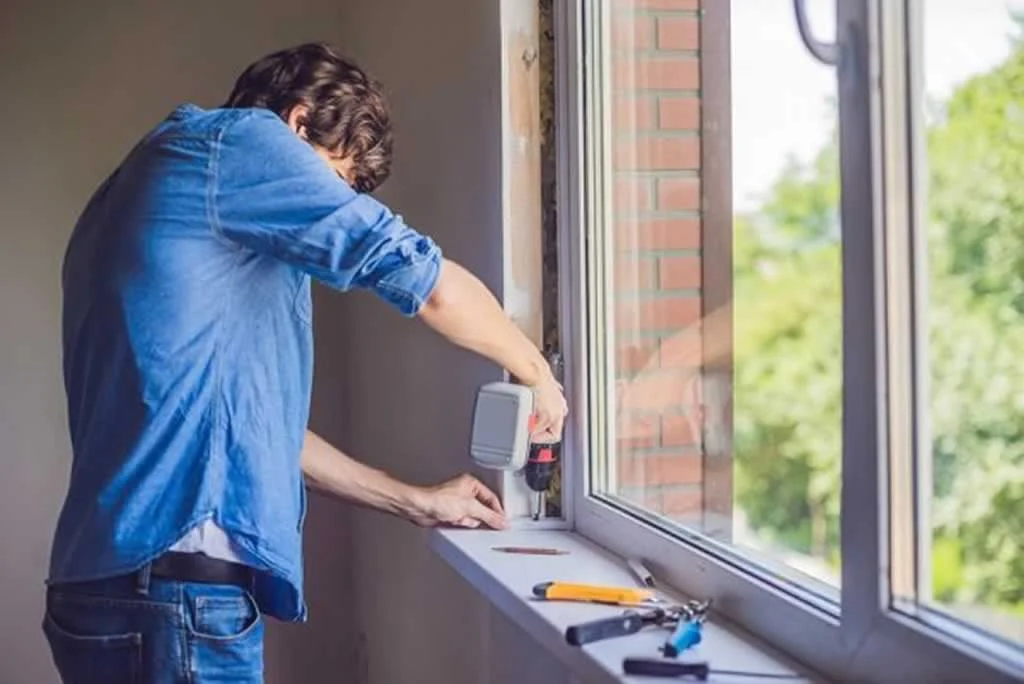
The Installation Process: A High-Level Overview
Every installation is different, but here’s the general process for a pocket replacement:
- Remove the interior stops and existing sashes. Use a utility knife to score any painted edges before prying to avoid tearing drywall.
- Inspect the existing frame. Check for rot, moisture damage, and squareness with your level. If anything is questionable, stop and evaluate whether a full-frame replacement is needed.
- Clean up the frame. Remove old hardware, weatherstripping, and any buildup that would interfere with the new unit sitting flat.
- Dry-fit the new window. Before fastening anything, set the window into the opening and check it for level, plumb, and square. Use shims to make corrections.
- Fasten and seal. Follow the manufacturer’s fastening instructions exactly. Apply a bead of caulk along the exterior perimeter before driving screws.
- Insulate the gaps. Use low-expansion foam insulation around the perimeter of the frame. High-expansion foam can bow the frame and bind the sashes, so use the right product.
- Reinstall or replace interior stops and trim. Finish with interior caulk where the window meets the interior trim.
- Test operation. Open and close each sash. Lock and unlock the hardware. Make sure everything moves freely and seals properly.
Common Mistakes to Avoid
Skipping the frame inspection. Rotted or deteriorated framing will undermine even the best new window. Always inspect before you install.
Using high-expansion foam. This is a very common error. High-expansion foam can exert enough pressure to warp your new window frame and cause the sashes to stick or fail to seal.
Ignoring local building codes. Some jurisdictions require permits for window replacement, especially full-frame work. Check with your local building department before starting.
Not accounting for energy code requirements. Most areas now have minimum energy performance standards for replacement windows. Look for units with appropriate U-factor and Solar Heat Gain Coefficient (SHGC) ratings for your climate zone.
Ordering the wrong glass. Glass packages vary widely. Clear glass, Low-E coatings, and privacy glass options like fluted or obscure glass serve very different purposes. Make sure you’re ordering the right glass for the room and application.
When to Call a Professional
DIY window replacement is a legitimate option for skilled homeowners tackling standard pocket replacements in good condition. But there are situations where professional installation is genuinely the better call:
- The existing frames show signs of rot, mold, or structural damage
- The openings are significantly out of square
- You’re replacing bay or bow windows, which involve structural and roofing components
- Your home has older construction with non-standard rough openings
- The project requires new exterior casing, flashing, or siding work around the openings
- Manufacturer warranties require certified installation
Many premium window manufacturers require professional installation to validate the product warranty. That’s a detail worth reading before you commit to DIY, because a voided warranty on a high-end window can cost you significantly if something goes wrong down the road.
Final Thoughts
Window replacement is one of those projects that looks more straightforward than it is. Done right, it’s a deeply satisfying upgrade that delivers real, measurable returns in comfort and efficiency. Done wrong, it can lead to moisture intrusion, energy loss, and expensive repairs.
Take the time to understand your window type, measure carefully, choose the right replacement approach, and don’t skip the frame inspection. If the project scope grows beyond what you’re comfortable handling, there’s no shame in recognizing that and bringing in experienced hands. The goal is a well-sealed, properly installed window that performs for years to come, not just one that looks finished on day one.
About the author – John Barnes
 Handyman tips website was created by John Barnes from Phoenix, Arizona, in February 2014. John wanted to share with the public his 20 year experience in home improvement as a contractor and avid woodworker. John noticed that there aren’t many expert advice online and he wanted to help the public to get true expert tips and estimates. What started as a hobby soon became a full time job as Handyman tips website became very popular because of the quality of tips it provides. After a few years John has introduces a couple of new content creators into Handyman tips team but he is still the main content creator on Handyman tips website.