
How to Replace Shear Pins on a Snow Blower
Table of content
If your snow blower augers have stopped working properly, there’s a good chance it has something to do with the shear pins. A snow blower’s shear pins are located in the auger housing, connecting the augers to the main auger shaft. Your snow blower’s shear pins are designed to break (or “shear”) when a piece of debris gets stuck in the auger housing. The shear pins break to disconnect the augers from the main auger shaft and protect the rest of the snow blower from suffering any damage that could be caused by the debris being lodged in the auger housing.

Running into large, hard pieces of debris like ice or rocks is an unfortunate but common occurrence for even the most responsible snow blower operators, which means it’s also common for shear pins to break. For the most part, broken snow blower shear pins can be easily replaced. You can do the job yourself if you have the right shear pins and you follow the proper instructions. It’s good practice to keep one or two shear pin replacement kits at home so that you’re prepared when your snow blower’s shear pins break. Before buying a shear pin kit, remember to check your owner’s manual to ensure you get the right size shear pin.
And while you’re grabbing some extra shear pins, consider buying more replacement parts for your snow blower. It’s worth having an assortment on hand so that you’re ready when a part breaks. This helpful list from Troy-Bilt details a number of replacement parts worth storing in your garage or shed during snow season. Here’s a set of instructions detailing how to replace broken snow blower shear pins:
STEP 1: PREVENT ACCIDENTAL ENGINE START-UP
Before you do any type of work on your snow blower, especially within the auger housing, make sure to remove the ignition key and disconnect the spark plug boot so the engine doesn’t accidentally start while you’re working.
STEP 2: CLEAR DEBRIS FROM AUGER HOUSING
If you’re replacing the shear pin(s) immediately after they’ve broken, first remove whatever debris is still left in the snow blower’s auger housing. Do not use your hands to remove any type of debris from the auger housing as an accident could cause serious injury. Instead, use the chute cleanout tool that comes with your snow blower and is usually attached to the back of the auger housing.
STEP 3: REMOVE BROKEN SHEAR PINS
Locate the shear pins along the main auger shaft on either side of the gear case and remove the remnants of the broken shear pin using wrenches. Usually, the broken shear pins should be easy to remove from the auger shaft but it’s possible they could become stuck and you may have to hammer them out.
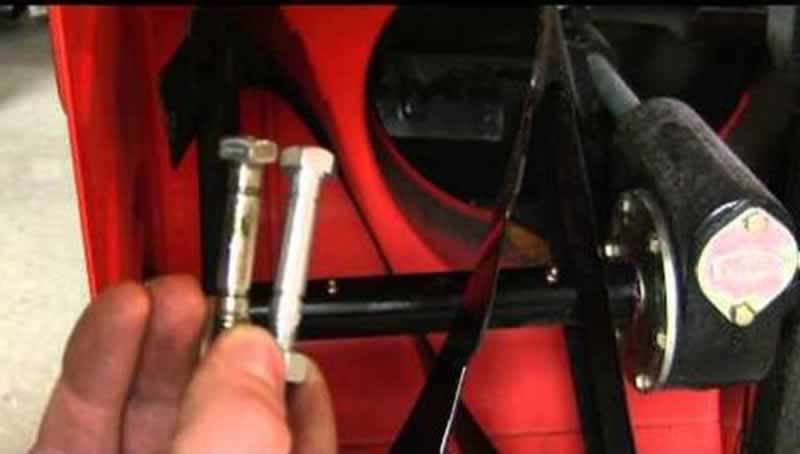
STEP 4: ATTACH NEW SHEAR PINS
Once you’ve removed the broken shear pins, re-align the auger and the auger shaft so the shear pin holes line up and then insert the new shear pin(s). Attach the nut to the bottom of the shear pin and tighten with it.
STEP 5: MANUALLY TEST NEW SHEAR PINS
Before reconnecting the snow blower’s spark plug and re-inserting the ignition key, turn the augers by hand to make sure the shear pins have been connected properly.
STEP 6: RESTART SNOW BLOWER
Once you’ve ensured the new shear pins are properly installed, reconnect the spark plug boot and re-insert the ignition key. Then start the blower to ensure everything is back in working order.
About the author – John Barnes
 Handyman tips website was created by John Barnes from Phoenix, Arizona, in February 2014. John wanted to share with the public his 20 year experience in home improvement as a contractor and avid woodworker. John noticed that there aren’t many expert advice online and he wanted to help the public to get true expert tips and estimates. What started as a hobby soon became a full time job as Handyman tips website became very popular because of the quality of tips it provides. After a few years John has introduces a couple of new content creators into Handyman tips team but he is still the main content creator on Handyman tips website.